Learning how to wax skis at home will not only make them last longer, it will also make your runs more fun as you’ll move faster and glide more smoothly. To wax your skis at home, you’ll need to:
- Choose a type of wax
- Prepare your skis with a base cleaner
- Use a brass brush to roughen surfaces
- Spread wax with a waxing iron
- Let your equipment cool and scrape off excess wax
- Use a nylon brush to smooth surfaces
A Step-by-Step Guide on How to Wax Skis at Home
Step One: Choose Your Wax
The first step to learning how to wax skis at home is to choose a type of wax. If you want to keep it simple, choose a universal wax that works for all temperatures. If you’re willing to put in a bit more effort for better performance, then choose a wax specifically for the temperatures you’re expecting (with the realization that you will have to change your wax as temperatures change).
Step Two: Apply a Base Cleaner
Next, prepare your surface by applying a base cleaner. Wait until the base is completely dry before proceeding.
Step Three: Wipe with Brass Brush
Once your skis are dry, take a closer look. If they look particularly smooth, you can use a brass brush to create a slightly rougher surface. Doing so will allow the skis to absorb more wax.
Step Four: Spread Wax with Waxing Iron
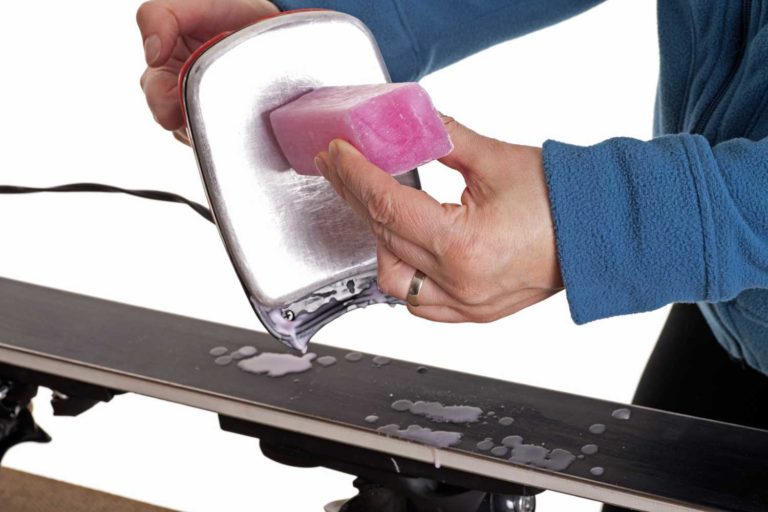
You’ll need an iron for the next step. Hold the iron with the tip pointing down and touch the wax to it until it begins to drip. Allow the wax to drip along the entire length of your skis, making sure most of the surface is covered with wax. Use your iron to spread the wax out evenly across your equipment. Be sure to keep the iron constantly moving to make sure you don’t overheat any area.
Step Five: Let Equipment Cool and Scrape Excess Wax
Let your equipment cool, then use a wax scraper gently to get rid of excess wax. Also scrape wax off the edges of your skis.
Step Six: Wipe with Nylon Brush
Finally, use a soft nylon brush to brush your skis from the tip to the tail for about five minutes. This last step will leave your equipment with just a fine layer of wax.
Useful Tips for Waxing Skis
You may be tempted to skip the iron and simply use a paste wax, which is basically just rubbed onto skis without the benefit of an iron. While this step can extend the life of a proper waxing (with an iron), it does not replace it.
Speaking of irons, many people wonder if it’s necessary to buy one designed specifically for waxing skis. It’s true that any iron will work, but waxing irons are designed for the lower temperatures required to wax skis. That means you won’t be second-guessing if you should iron your skis on a “linen” or “cotton” setting.
Also, keep in mind that if you choose to use a regular iron, it’ll be hard to get all the wax off of it, so you likely won’t be able to use it to iron clothing anymore.
How Often Do You Wax Skis?
There are quite a few factors to consider when deciding how often to wax skis at home. For starters, you should always wax your skis at the start of the season. After that, the answer depends on the conditions you’re skiing in, as well as how “fast” you like your skis to feel.
If the snow is light and powdery, you could make it two weeks on the slopes without needing to apply more wax. However, if the snow is icy or you’re skiing over tree roots or other hard objects, you may need to wax after every outing.
One easy way to check is to run your hands over your skis. If you can feel the grooves, then it’s time to apply more wax.
Self Storage Units Near You
Once you learn how to wax skis at home, you’ll be cruising down the slopes with ease. After the season is over, though, it’s not just your skis that take up space. It’s also your outdoor winter clothing, ski rack, waxing equipment, goggles, gloves, and more.
If you find that your storage space is getting stuffed, consider renting a self storage unit. At StorageMart, we offer clean, well-lit storage units in a variety of sizes—all of which can be rented on a month-to-month basis. Check out our storage unit guide, or rent a unit online today.
With self storage, all your gear will be out of your way but ready and easy to access whenever you need it.
Updated February 13, 2020


